
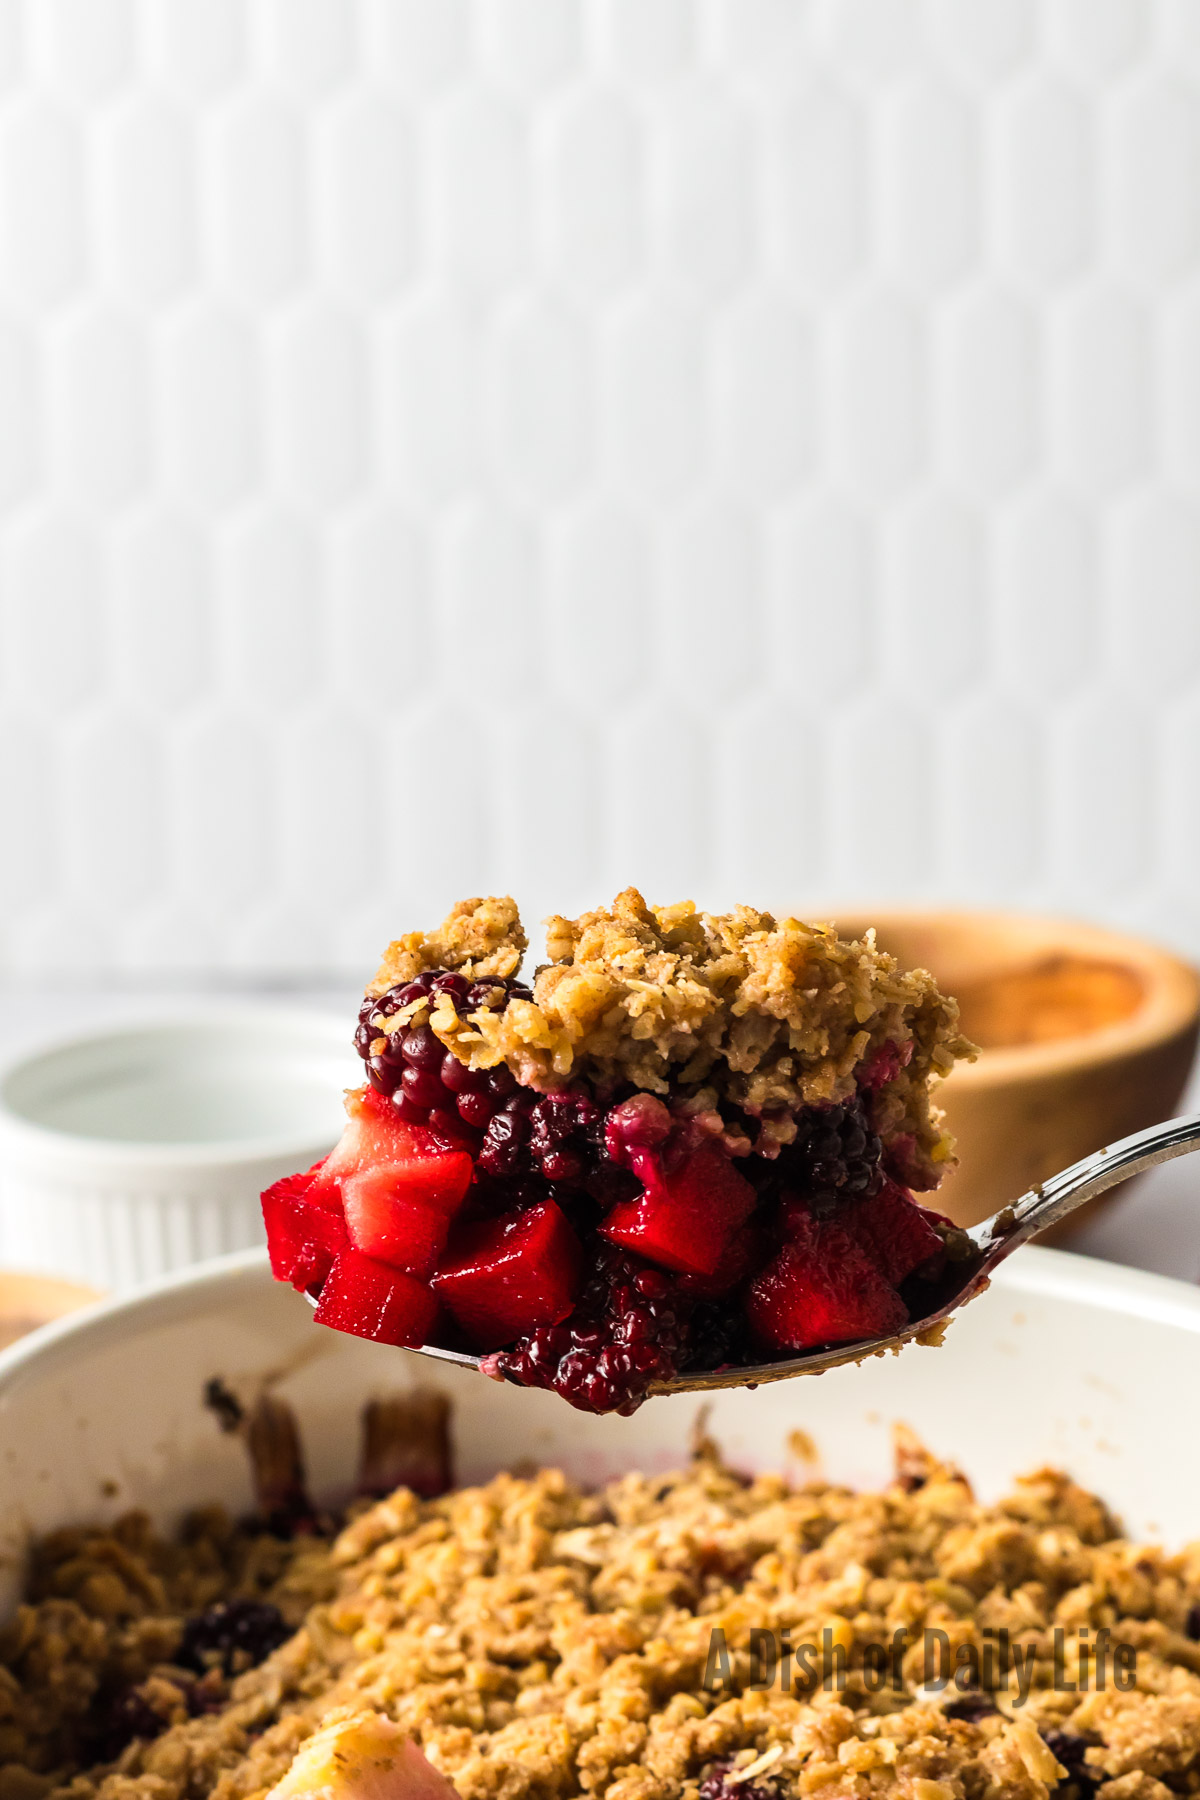
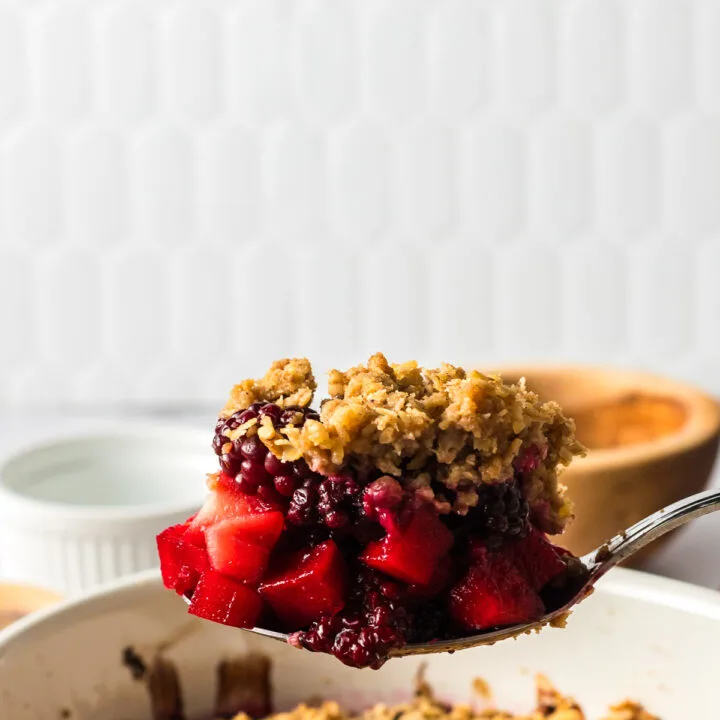
There’s a specific kind of comfort that only comes from a crumble still warm from the oven. When it comes to easy desserts, this Apple and Blackberry Crumble topped with a scoop of ice cream really can’t be beat.
The buttery crumble alone has my mouthwatering. Plus the best part is that you don’t have to wait for blackberry season, you can find blackberries all year round!


The smell alone of this apple crumble while it’s baking will stop anyone mid stroll in the kitchen.
It’s the sound of the crust cracking under a spoon, the way the fruit bubbles up around the edges like molten jam, and that first bite where tart blackberries collide with sweet apples under a buttery avalanche of oat topping.
It’s not fussy. It doesn’t require a stand mixer or pastry skills you learned in culinary school.
It just works.
And once you nail the ratio and the bake, you’ll never reach for another recipe again.


History and Origin
Crumbles came out of wartime Britain when butter, flour, and sugar were rationed and nobody had the bandwidth for intricate pastry.
The concept was simple: stretch what you had by piling fruit into a dish and scattering a mixture of whatever grain, fat, and sweetener remained on top.
Apples were abundant, blackberries grew wild in hedgerows, and oats were cheap.
The result was a dessert that tasted indulgent without demanding much from the cook or the pantry.
Post-war, crumbles stuck around because they delivered maximum flavor with minimum effort. You didn’t need precision or technique. Just fruit, topping, heat.
Over time, the dish migrated to America and Australia, spawning cousins like crisps and cobblers, but the British crumble stayed true to its roots: unpretentious, fruit-forward, and built for sharing.
It remains one of the most forgiving desserts in the canon, which is exactly why it’s worth mastering. The baseline is easy. The exceptional version just takes a few intentional moves.


Why This Recipe Works
Most crumble recipes fail in one of two places: soupy fruit or a topping that bakes up pale and chewy instead of golden and crisp.
This version solves both problems by treating the fruit and topping as two separate systems that need to be engineered for contrast.
The fruit gets tossed with just enough cornstarch to thicken the juices without turning them gluey, and a hit of lemon juice keeps the sweetness in check.
The topping uses cold butter cut into oats, flour, and brown sugar until it looks like wet sand, which creates those big, craggy clusters that shatter when you press a spoon through them.
Baking on the lower-middle rack gives the fruit time to break down and bubble before the top gets too dark.
The ratio here leans heavy on fruit, which is correct.
You want the crumble to accent the filling, not bury it. Too much topping and it tastes like granola on stewed apples. Not enough and you lose the textural payoff.
This version finds the middle: enough crumble to deliver crunch in every bite, but not so much that it weighs down the fruit. The brown sugar in the topping also adds a caramel note that plays perfectly against the tartness of the blackberries.
It’s a dessert that tastes way more complicated than the effort required to make it, which is the entire point.


Equipment You’ll Need
You don’t need specialty gear, but a few specific pieces will make the process smoother and the results more consistent.
- A 9×9-inch or 2-quart baking dish: This size gives you the right fruit-to-topping ratio and ensures even baking. Ceramic or glass both work. Metal heats faster but can overbrown the edges.
- A pastry cutter or fork: Cold butter needs to be worked into the dry ingredients without melting. A pastry cutter is faster, but a fork or your fingertips work if you move quickly.
- A large mixing bowl: You need room to toss the fruit without bruising it and space to combine the topping ingredients without making a mess.
- A sharp paring knife: Peeling and slicing apples cleanly makes a difference in texture. Dull knives crush the fruit and leave you with uneven pieces that cook at different rates.
- Parchment paper (optional): Lining the dish makes cleanup easier, but it’s not mandatory. If your dish is well-buttered, you’ll be fine.
If you don’t have a pastry cutter, two knives used in a scissor motion will break up the butter.
If your baking dish is slightly larger or smaller, just adjust the bake time by a few minutes and watch for visual cues.
The goal is bubbling fruit and a deeply golden top. As long as you hit those marks, the exact vessel doesn’t matter as much as you think.


Ingredients and What They Do
Every ingredient here has a job, and swapping or skipping one will shift the final result in ways you need to anticipate.
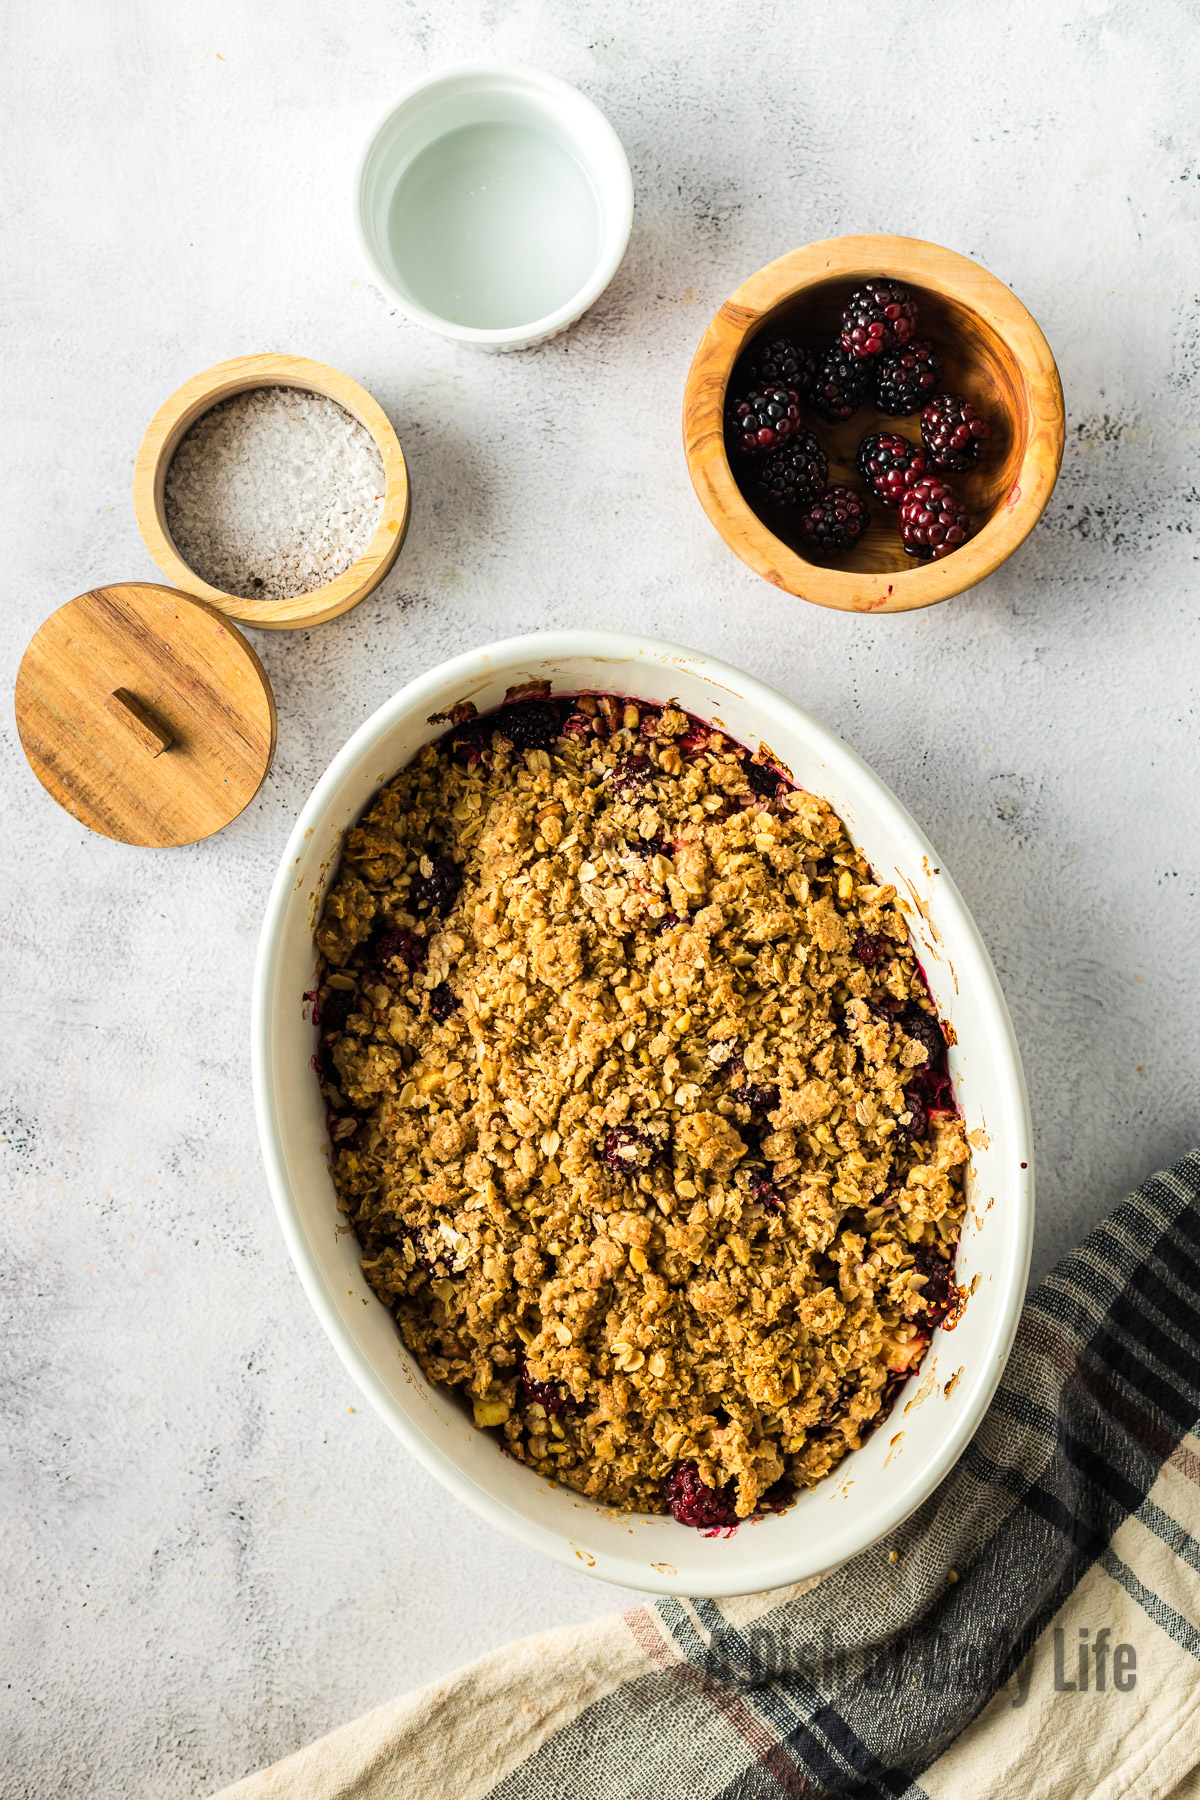
For the Filling:
- 2 medium apples (Honeycrisp or pink lady are great options): Granny Smith holds its shape and adds tartness. Honeycrisp brings sweetness and a softer texture. Mixing both gives you complexity. Avoid Red Delicious, which turns to mush.
- 18 ounces fresh blackberries: Frozen works just as well as fresh, however see our tip below. If using frozen, don’t thaw them first or you’ll end up with too much liquid. Blackberries provide the tartness and deep color that defines the dish.
- 1/2 teaspoon vanilla extract: Not traditional, but it deepens the flavor without announcing itself. You won’t taste vanilla, just a rounder, warmer fruit filling.
- 1 Tablespoon raw honey: This balances the acidity of the fruit.
- 1 lemon zested: Adds a punch of flavor and highlights the other fruits.
- 2 teaspoons lemon juice: Brightens the fruit and keeps the apples from browning. It also cuts through the sugar and prevents the filling from tasting one-note.
Pro Tip: If using frozen blackberries you can leave them frozen but you’ll need to add in 1 Tablespoon cornstarch to thicken the sauce.
For the Topping:
- 1 cup old-fashioned rolled oats: These create texture and prevent the topping from tasting like raw flour. Quick oats turn to paste. Steel-cut oats won’t soften in time.
- 3 Tablespoons almond flour: Binds the topping and helps it crisp up. Too much flour and it tastes doughy. Too little and it won’t hold together.
- 1/4 cup chopped walnuts: This adds a lovely nutty crunch to the topping.
- 1/4 cup packed light brown sugar: Adds moisture, chew, and a hint of molasses. Dark brown sugar works but will taste more assertive. White sugar makes a drier, less interesting topping.
- 1/2 teaspoon cinnamon: Just enough to add warmth without turning this into apple pie. You can skip it if you want the fruit to be the only star.
- 1/4 teaspoon ground nutmeg: Just a pinch goes a long way to add warmth of flavor to this dish.
- 1/8 teaspoon salt: Balances sweetness and makes everything taste more like itself. Never skip the salt in a dessert.
- 4 tablespoons cold unsalted butter, cubed: This is what makes the topping crisp and golden. It needs to stay cold so it doesn’t melt into the dry ingredients before baking. Melted butter makes a dense, greasy topping.
You can find everything here at any grocery store. If blackberries are out of season or expensive, use raspberries, blueberries, or a mix. The apple-to-berry ratio should stay around 60/40 to keep the structure intact. Berries alone get too jammy. Apples alone lack the pop of acidity that makes this interesting.


Step-by-Step Instructions
This is the part where technique matters, but don’t overthink it.
- Preheat your oven to 350°F. Position the rack in the lower-middle slot. This gives the bottom of the dish enough heat to cook the fruit through before the topping burns.
- Prep the fruit. Peel and core the apples, then slice them into 1/4-inch-thick pieces. Toss them in a large bowl with the juicy blackberries, apples, vanilla, honey, lemon zest and lemon juice. Mix gently until the fruit is evenly coated. Let it sit for 5 minutes so the cornstarch dissolves and the sugar starts pulling moisture from the fruit.
- Transfer the fruit to your square baking dish. Spread it out evenly. If there are big gaps, the topping will sink and you’ll lose the layered effect. Press it down gently with the back of a spoon.
- Make the topping. In a separate bowl, combine the oats, flour, walnuts, brown sugar, cinnamon, nutmeg, and salt. Add the cold butter cubes. Use a pastry cutter, fork, or your fingertips to work the butter into the dry ingredients until the mixture looks like coarse, clumpy sand. You want pea-sized pieces of butter still visible. This is what creates texture.
- Scatter the crumble topping over the fruit. Don’t press it down. You want it loose and uneven so some parts crisp up more than others. The irregular surface is what gives you those shatteringly crunchy bits.
- Bake for 45 to 50 minutes. You’re looking for the fruit to bubble up around the edges and the topping to turn a deep golden brown. If the top is browning too fast, tent it loosely with foil for the last 10 minutes.
- Cool for at least 15 minutes before serving. The filling needs time to set. If you dig in immediately, it’ll be molten and runny. After 15 minutes, it’ll hold its shape but still be warm enough to melt vanilla ice cream on contact.
The hardest part of this recipe is waiting. Everything else is just combining ingredients and letting the oven do the work. If your fruit releases more liquid than expected, it’s fine. The cornstarch will catch up as it bakes. If your topping looks pale after 50 minutes, give it another 5 under the broiler, but watch it like a hawk. It goes from golden to burnt in under a minute.
How to Know It’s Done
Timers are helpful, but your eyes and nose will tell you more than the clock ever will.
The fruit should be bubbling vigorously at the edges and the juices should look thick and glossy, not watery.
If you stick a spoon into the center and the liquid runs thin, it needs more time.
The topping should be a deep amber color, not pale tan. Pale means it’s baked but not caramelized, and you’ll miss out on the nutty, buttery flavor that makes this dish crave-worthy.
The smell is the final tell. When the kitchen smells like brown butter, toasted oats, and jammy fruit, you’re there.
If you pull it too early, the fruit will taste raw and the topping will be soft. If you overbake it, the fruit turns to mush and the topping gets hard instead of crisp.
The sweet spot is right when the bubbles slow down but haven’t stopped completely and the topping has gone from blonde to bronze. That’s your window.

Tips from the Pros
These are the small moves that separate a decent crumble from one that makes people ask for the recipe.
- Use cold butter and work fast. Room-temperature butter melts into the flour and turns the topping dense. You want chunks of butter that steam and crisp as they bake.
- Don’t skimp on the lemon juice. Acidity is what keeps this from tasting like a sugar bomb. Even if your fruit seems tart, add it anyway.
- Let the fruit sit after tossing. Those five minutes allow the cornstarch to hydrate and the sugar to dissolve, which prevents clumping and uneven thickening.
- Underfill slightly rather than overfill. A heaping dish looks generous, but it’ll bubble over in the oven and burn onto your rack. Leave a half-inch of clearance at the top.
- Rotate halfway through if your oven has hot spots. Most home ovens bake unevenly. A quick 180-degree turn at the 25-minute mark evens everything out.
The pros also know that fruit crisps improves on day two. The topping softens slightly but stays crisp enough, and the fruit thickens even more as it cools and rests. If you’re making this ahead, bake it the day before and reheat individual portions in a 300°F oven for 10 minutes.
Serving Suggestions
Presentation matters less here than temperature and pairing, but a little thought goes a long way.
Serve this warm, not hot. Scalding fruit will burn your mouth and you won’t taste anything. Let it cool just enough that the sauce can thicken so you aren’t serving soup.
Spoon it into shallow bowls instead of plates so the juices pool at the bottom and you can chase them with your spoon.
A big scoop of vanilla ice cream or barely sweetened whipped cream is non-negotiable. The contrast between warm, tart fruit and cold, creamy dairy is the entire point of a fruit crumble.
If you want to be extra, drizzle each serving with salted caramel or a spoonful of crème fraîche. A dusting of powdered sugar over the top looks nice but doesn’t add much flavor. Save your effort for the ice cream.

Pairing Suggestions
We suggest serving this as an after dinner treat. Some of our favorite main dishes are:
- Chicken Scarpariello
- Grilled Salmon with Mayo
- Korean BBQ Chicken Recipe
- Citrus Shirmp Recipe
- Seafood Pasta Recipe
- Creamy Mustard Chicken
- Lemon Herb Chicken and Potatoes
- Vegetable Risotto
- Red Wine Braised Pork Shoulder
- Creamy Red Enchiladas
- Spicy Turkey Burger Recipe
- Slow Cooked Brisket in Oven
- Creamy Jambalaya Pasta Recipe
- Country Pie Recipe
- Daikon Salad
Variations and Swaps
Once you’ve nailed the base recipe for this Blackberry Apple Crumble, there are about a dozen ways to riff on it without losing what makes it work.
- Swap the blackberries for raspberries, blueberries, or a mix of whatever berries you have. Stone fruit works too: peaches, plums, or cherries all pair beautifully with apples.
- Add a Tablespoon of chopped fresh ginger to the filling for heat, or replace the cinnamon in the topping with cardamom for a more floral vibe.
- This version is gluten free. However if you want a gluten version, just swap the flour for all purpose flour instead of almond flour.
- If you’re avoiding refined sugar, coconut sugar works in both the filling and the topping, though it’ll make everything taste a little more caramel-forward.
- You can turn this into individual servings by dividing the fruit and topping among ramekins and reducing the bake time to 30 to 35 minutes. Smaller vessels mean faster cooking and more crispy edges per serving, which is never a bad thing.


Storage Tips
Crumble keeps well, which makes it one of the rare desserts that actually benefits from being made ahead.
Let it cool completely, then cover the baking dish tightly with plastic wrap or transfer portions to an airtight container. It’ll keep in the fridge for up to four days.
The topping will soften as it sits, but a quick reheat in a 300°F oven or air fryer for 5 to 10 minutes brings back most of the crispness. Don’t microwave it unless you’re fine with the topping turning chewy and the fruit scorching in spots.
If you want to freeze it, do it before baking.
Assemble the whole thing, cover it tightly with plastic wrap and then foil, and freeze for up to three months.
When you’re ready to bake, pull it straight from the freezer and add 10 to 15 minutes to the bake time. You can also freeze baked crumble, but the topping never fully recovers its original texture.
Pro Tip: Remember to add an extra teaspoon of cornstarch or two if freezing head of time.
Leftover Transformations
If you somehow have leftovers, and that’s a big if, there are a few ways to repurpose them that feel less like eating day-old dessert and more like a whole new thing.
- Spoon cold crumble over Greek yogurt for breakfast. The tartness of the yogurt plays off the sweetness of the fruit, and the oat topping adds crunch.
- You can also blend leftover crumble with milk and ice to make a fruit crisp milkshake, which sounds chaotic but tastes like the best soft-serve you’ve ever had.
- For something more refined, layer crumble with mascarpone or whipped cream in a glass to make a quick trifle. The textures stay distinct and it looks impressive with almost zero effort.
- Or just eat it cold, straight from the fridge, standing over the sink at midnight. No one’s judging.


This is the kind of dessert that doesn’t demand perfection but rewards attention. Get the fruit right, don’t overwork the topping, and trust the oven to do what it does best.
Once you’ve made this easy Apple Blackberry Crumble recipe a few times, you’ll stop measuring and start going by feel. That’s when you know you’ve really nailed it.
Rich fruit mixed with a crunchy crumble mixture really tastes like heaven on earth. What are you waiting for – go make yours today!

Apple and Blackberry Crumble
Apple and Blackberry Crumble is the perfect blend of blackberries and apples all mixed with a crumble topping. It's satisfying and wholesome.
Ingredients
Instructions
- Preheat oven to 350*F
- Combine blackberries, apples, vanilla extract, honey, lemon zest and lemon juice in a 2 quart baking dish.
- In a new bowl, combine crumble topping ingredients together with your hands. This includes rolled oats, almond flour, walnuts, salt, cinnamon, nutmeg, brown sugar and butter. Work the butter in so it is vaguely cohesive.
- Spread the crumble evenly over the fruit, but let it be loose. If fruit pokes through the surface that's totally fine (in my opinion, it's actually preferable to an unbroken topping.)
- Bake for 25 to 35 minutes until the topping is browned and the fruit juices are bubbling up the sides.
- Serve warm.
Nutrition Information:
Yield: 6 Serving Size: 1Amount Per Serving: Calories: 476Total Fat: 36gSaturated Fat: 7gUnsaturated Fat: 29gCholesterol: 20mgSodium: 74mgCarbohydrates: 31gFiber: 11gSugar: 13gProtein: 13g
Photos & Text Updated: April 6, 2026